
Okay, so I had to get a visa to visit Singapore, and I figured I’d share my experience since it was all done online. It wasn’t too bad, but there were a few things that tripped me up along the way.
Getting Started
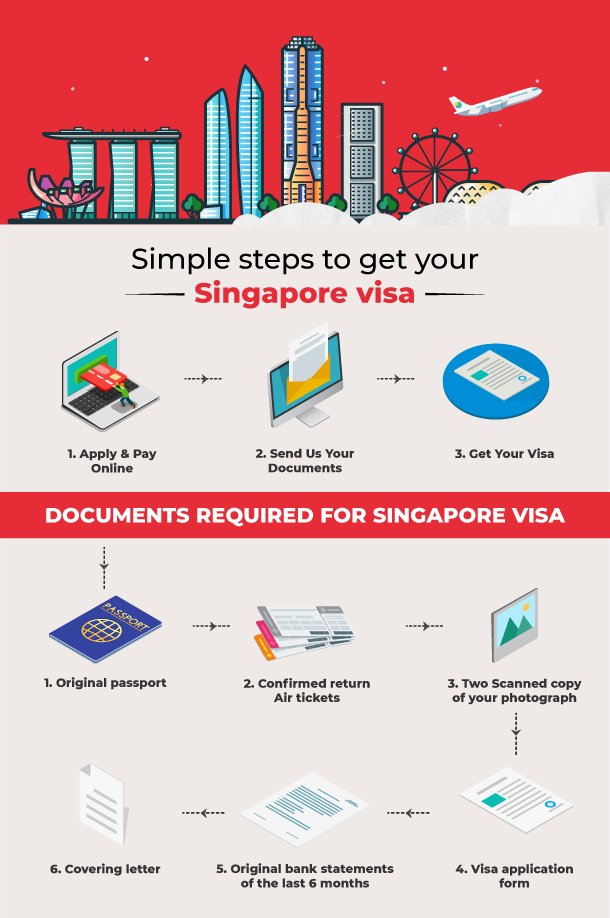
First off, I went to the official website for Singapore visa applications. I don’t remember exactly, but just search on Google, you can find it. It’s pretty straightforward, you know, the usual government website vibes. I found the section for the e-Visa and got started.
Filling Out the Forms
There were a bunch of forms to fill out online. Basic stuff like name, passport details, travel dates, where I’d be staying in Singapore, and so on. They also asked about my travel history, any past visa rejections, and if I had any criminal records. I made sure to double-check everything because I didn’t want any mistakes messing up my application.
Uploading Documents
Then came the document uploads. I needed a digital photo of myself, and it had to meet specific requirements, like size and background color. Make sure you read it! I also scanned my passport’s bio page. They might ask for other stuff too, like proof of accommodation or return tickets, but for me, that was it.
Paying the Fee
After all the forms and uploads, it was time to pay. I think it was around 30 Singapore dollars, but don’t quote me on that. I just paid with my credit card. They send you a confirmation email once the payment goes through. Keep that email safe, it has your application reference number.
Waiting Game
Now, the waiting. They say it takes about 1 to 3 business days to process, but mine took a little longer, like 5 days. I was getting a bit anxious, but it all worked out in the end. I kept checking my email like crazy, even the spam folder, just in case.
Visa Approved!
Finally, I got an email saying my visa was approved! They sent me a PDF of the e-Visa, which I printed out. I also saved it on my phone, just to be safe. It’s valid for multiple entries, which is cool, but each stay can’t be longer than 30 days. Also, be sure to apply for it at least 30 days before you travel, just to be on the safe side.
Some Tips
- Double-check everything: Seriously, any typos or wrong info can lead to delays or even rejection.
- Have your documents ready: Scan your passport, get a digital photo that meets their requirements, and have proof of where you’re staying.
- Be patient: It might take a few days to get your visa, so don’t panic if it’s not instant.
- Keep all the emails: That reference number is important if you need to check your application status.
- Print it out: Even though it’s an e-Visa, have a printed copy with you when you travel.
All in all, it wasn’t a super difficult process, just a bit tedious. As long as you follow the instructions and have all your ducks in a row, you should be fine. Just remember to apply well in advance of your trip, you know, to avoid any last-minute stress. Safe travels!